How to Fix-A-Flat Instructional Guide
Remove the wheel
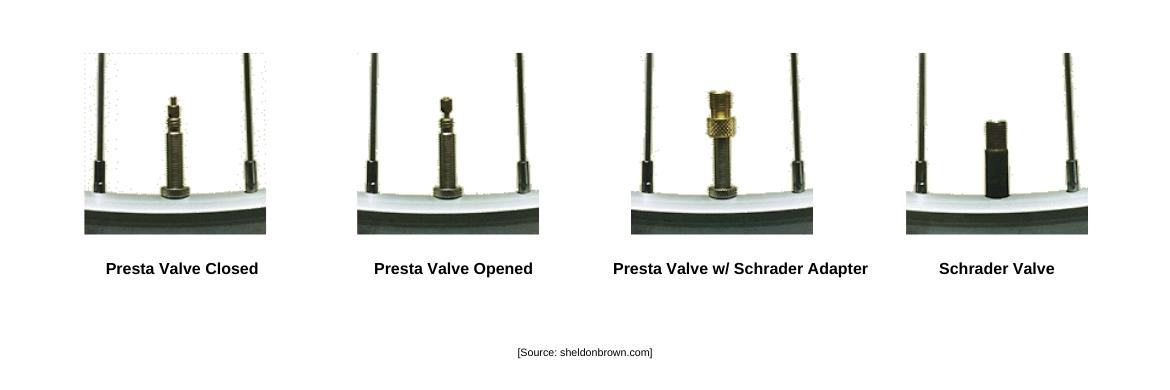
Remove the valve cap
If a presta valve, open the valve and press to release pressure / air in the tube.
If a schrader valve, press on the internal release for air to escape.
Use the ground to apply pressure on the tire with your body weight. This will release any remaining air, making it easier to remove the tube.
Go under the tire and grab the tube from the point opposite of the valve.
Once the tube is removed, hang the tire in the same orientation as it was uninstalled, valve down.
Remove the tire from the rim entirely.
Also hang the tire as it came off of the rim, valve down.
Look to identify the hole within the tube. Use a pump to add some air and listen and feel for where the air escapes.
After identifying the area of the hole in the tube, keep the location in mind, and very carefully run your fingers through the underside of the tire to feel for any obstructions - thorns, glass, sticks, etc.
**If available, we would highly recommend using a piece of fabric as a barrier between your fingers and the tire to avoid any injury to your hands or fingers; we have seen instances where people have picked up nails or needles, which is not something you want to worry about piercing your skin.**
If there is a foreign object present, remove the foreign object. You most likely will not have needle-nose pliers with you on the road, so in the event that you cannot fully remove the obstruction, do your best to break it off as close to the tire as you can.
Install half of the tire back on the rim BUT ensure that your tire is installed in the right direction.
** Tires have directional indicators on them. Sometimes there are arrows on the sidewall or a pattern in the tread that has an obvious point going forward.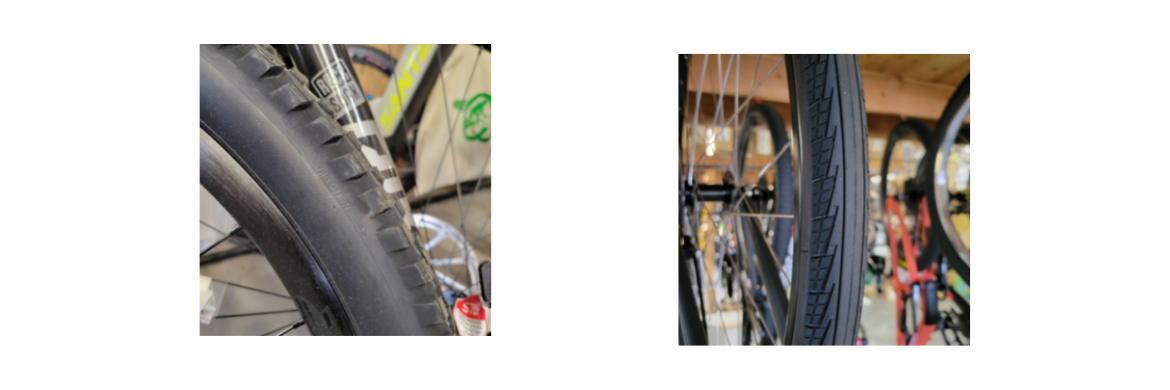
** The disc brake on a bike indicates the drive-side. The drive-side of the bike is the side with all of the gears. The non-drive-side of the bike is the side of the bike without the gears. 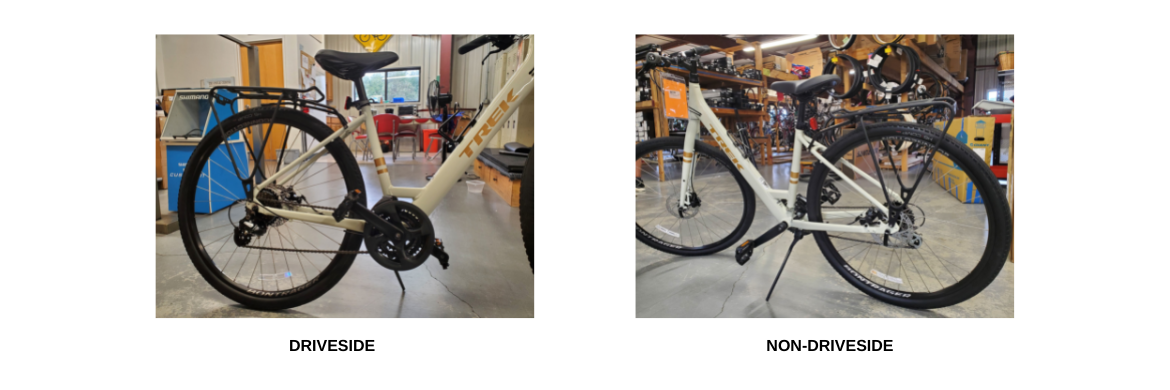
Pump up the tube only enough so it takes loose shape; too much air will work against you.
Push the released side of the tire towards the installed side, revealing the valve hole.
Place the valve of the tube into the rim.
Gently work the tube into the rim cavity.
Starting at the valve, push the tire into the rim cavity. Using the palms of your hands, push both the right and left of the released side of the tire at once, moving from the center all the way around the rim. Complete this until the entire tire is back in place.
**Sometimes the end of installing the tire back on the rim takes a little extra umph.Using your pump, air up the tire so it takes shape, but do not air up to recommended pressure yet.
Check the bead of the tire to ensure it is sitting properly in the rim. Doing this ensures that the tube will not explode while airing up.
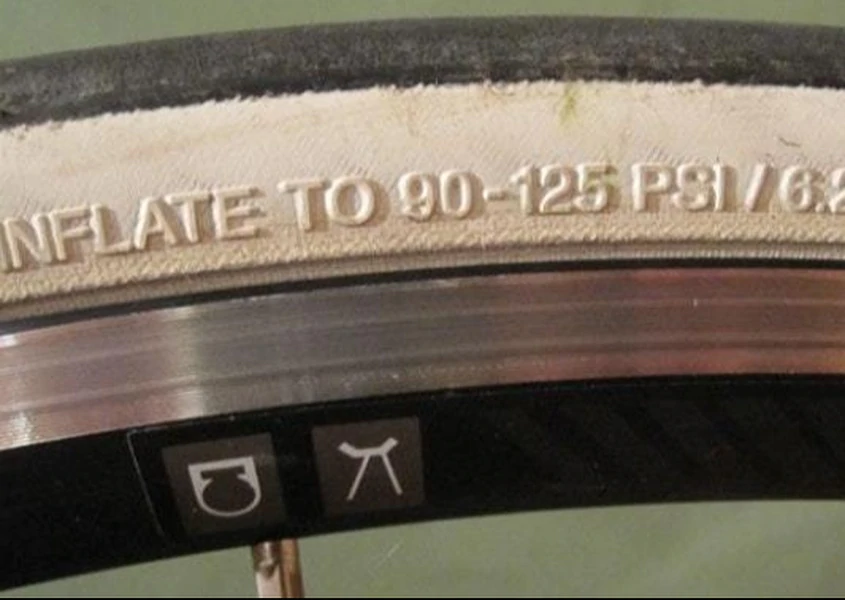
Air up the tire to the recommended pressure. This measurement is noted in “PSI”, which can be found on the sidewall of your tire if you forget the magic number.